

Image Augmentation Techniques to Boost Your CV Model Performance
Image by Editor | ChatGPT
In this article, you will learn:
- the purpose and benefits of image augmentation techniques in computer vision for improving model generalization and diversity.
- four common image augmentation strategies (horizontal flips, rotation, zooming, brightness adjustment) and their specific use cases.
- how to implement these augmentation techniques using the Keras API in Python, including a full example of integrating them into a Convolutional Neural Network (CNN).
Introduction
Image augmentation techniques, such as flipping images, rotating them, and so on, are commonly utilized in computer vision models due to their ability to increase the diversity in the original dataset used to train and validate the model, as well as to improve model generalization, making it perform better.
This article discusses four different image augmentation techniques — horizontal flips, rotation, zooming, and brightness adjustment — in computer vision and outlines some examples of their use in Python, concretely, aided by the Keras API for building deep learning models.
Four Common Image Augmentation Strategies
Below, we introduce and briefly discuss four essential image augmentation strategies, highlighting their purpose, use cases where they apply, and how to implement them in Keras. They are designed to be applied randomly on image datasets, so that a diversity of image settings is obtained to help train more robust models.
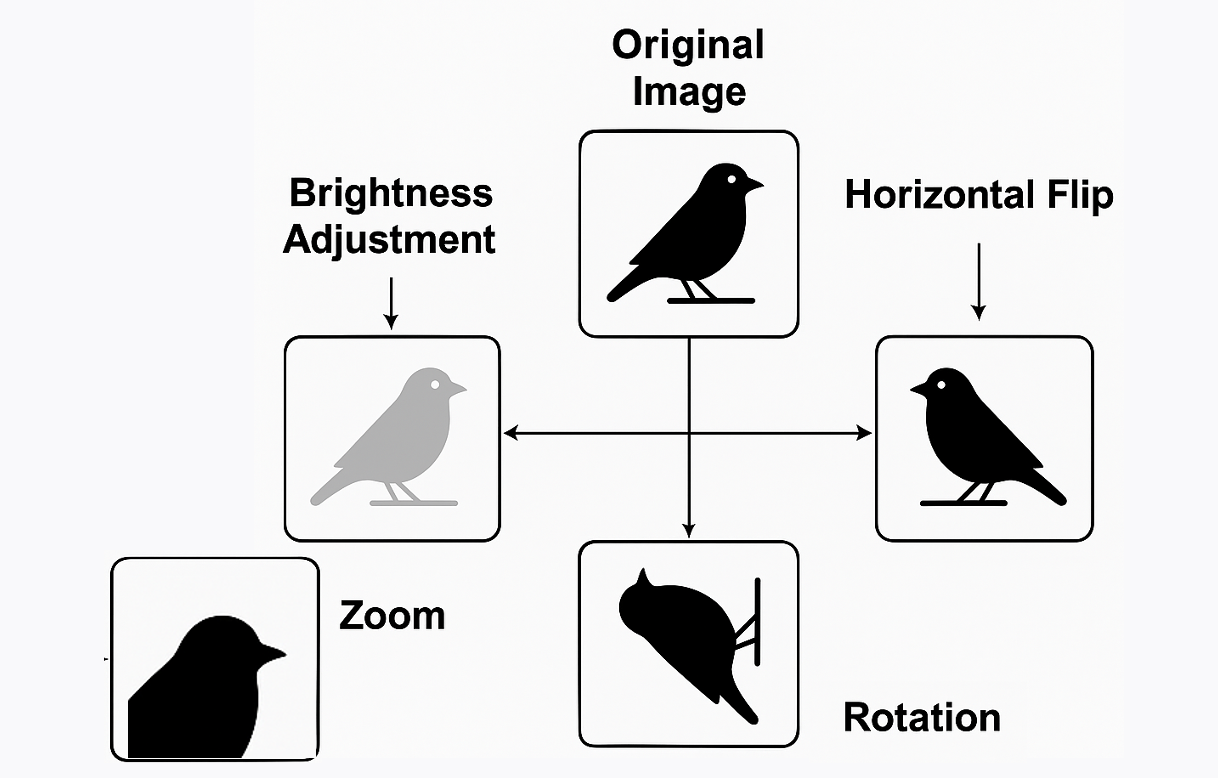
Image augmentation techniques
Image by Author | ChatGPT & Modifications
Horizontal Flip
The purpose of horizontally flipping an image is to help the model become invariant to the left-right orientation of objects. For instance, consider a training dataset of bird images in which all birds are facing left. A model for bird species classification trained on this data might struggle to perform accurately if it were later given new images of birds facing right. This is because it hasn’t learned image properties from birds facing in different directions, i.e., the training data was not sufficiently diverse.
Horizontal flipping is, therefore, particularly handy for models that analyze images of natural scenes, faces, or objects that are symmetrical or may sometimes appear mirrored.
Keras allows for implementing this image augmentation approach as follows—the RandomFlip class also supports vertical flipping:
|
from keras.layers import RandomFlip layer = RandomFlip(“horizontal”) |
Rotation
Rotation is another approach used to make a model more robust to variations among images that should be analyzed or predicted similarly, thereby increasing its robustness to orientation changes.
Rotation helps enhance the performance of models in which images might not always be perfectly aligned, for instance, satellite photos, aerial snapshots of crops taken by drones, or medical images.
Keras Implementation (the factor=0.1 represents a random rotation in the range of [-36, 36] degrees):
|
from keras.layers import RandomRotation layer = RandomRotation(factor=0.1) |
Zoom
The purpose of zooming images in computer vision models is to simulate changes in distance between the main object in the image and the camera so that the model can learn to recognize similar or identical objects regardless of them appearing closer or farther away.
Zooming is particularly handy for computer vision models built for detecting objects or classifying images in which the object scale may vary, for instance, in images collected by traffic control cameras or inside autonomous vehicles.
Keras Implementation—with zoom randomly ranging in height and width between 80% and 120% of the original scale:
|
from keras.layers import RandomZoom layer = RandomZoom(height_factor=0.2, width_factor=0.2) |
Brightness Adjustment
This augmentation strategy increases robustness to images with variations in light levels, like images of a location or object taken at different times of the day or under different weather conditions. It is extremely useful for applications like surveillance systems.
The Keras implementation we will look at first is not as straightforward, as it requires a manually defined class inheriting from Keras’ Layer and, importantly, using the tf.image.random_brightness() function:
|
1 2 3 4 5 6 7 8 9 10 11 12 13 14 15 16 17 18 |
import tensorflow as tf from keras.layers import Layer
class RandomBrightness(Layer): def __init__(self, max_delta, **kwargs): super().__init__(**kwargs) self.max_delta = max_delta
def call(self, inputs): return tf.image.random_brightness(inputs, max_delta=self.max_delta)
def get_config(self): config = super().get_config() config.update({“max_delta”: self.max_delta}) return config
# Example of instantiating the layer brightness_layer = RandomBrightness(max_delta=0.2) |
Once the class is created, an object can be instantiated. Here, we passed a max_delta value of 0.2, indicating that a random brightness variation up to 20% will be applied to the images.
While creating a custom layer is a powerful technique, it’s worth noting that Keras also provides a built-in tf.keras.layers.RandomBrightness layer that accomplishes this slightly more easily. This layer works by multiplying the image pixels by a random factor, making it a convenient and less error-prone alternative for most use cases.
Here is how one could implement it:
|
from keras.layers import RandomBrightness
# Adjust brightness by a random factor in the range [0.8, 1.2] layer = RandomBrightness(factor=0.2) |
Putting Them All Together in a Neural Network
Finally, the following code block shows a simple example of a neural network architecture that applies all four of the image augmentations discussed. This augmentation pipeline is then used as the first part of a complete Convolutional Neural Network (CNN).
|
1 2 3 4 5 6 7 8 9 10 11 12 13 14 15 16 17 18 19 20 21 22 23 24 25 26 27 28 29 30 31 32 33 34 35 36 37 38 39 40 41 42 43 |
import tensorflow as tf from keras.models import Sequential from keras.layers import ( Layer, Input, RandomFlip, RandomRotation, RandomZoom, Conv2D, MaxPooling2D, Flatten, Dense )
# Custom layer for brightness augmentation (as defined previously) class RandomBrightness(Layer): def __init__(self, max_delta, **kwargs): super().__init__(**kwargs) self.max_delta = max_delta
def call(self, inputs): return tf.image.random_brightness(inputs, max_delta=self.max_delta)
def get_config(self): config = super().get_config() config.update({“max_delta”: self.max_delta}) return config
# Define the data augmentation pipeline data_augmentation = Sequential([ Input(shape=(128, 128, 3)), RandomFlip(“horizontal”), RandomRotation(0.1), RandomZoom(height_factor=0.2, width_factor=0.2), RandomBrightness(max_delta=0.2) ], name=“data_augmentation”)
# Simple CNN model that incorporates the augmentation layers model = Sequential([ data_augmentation, Conv2D(32, (3, 3), activation=‘relu’), MaxPooling2D(), Conv2D(64, (3, 3), activation=‘relu’), MaxPooling2D(), Flatten(), Dense(64, activation=‘relu’), Dense(10, activation=‘softmax’) # Example CNN for classification with 10 classes ])
model.summary() |
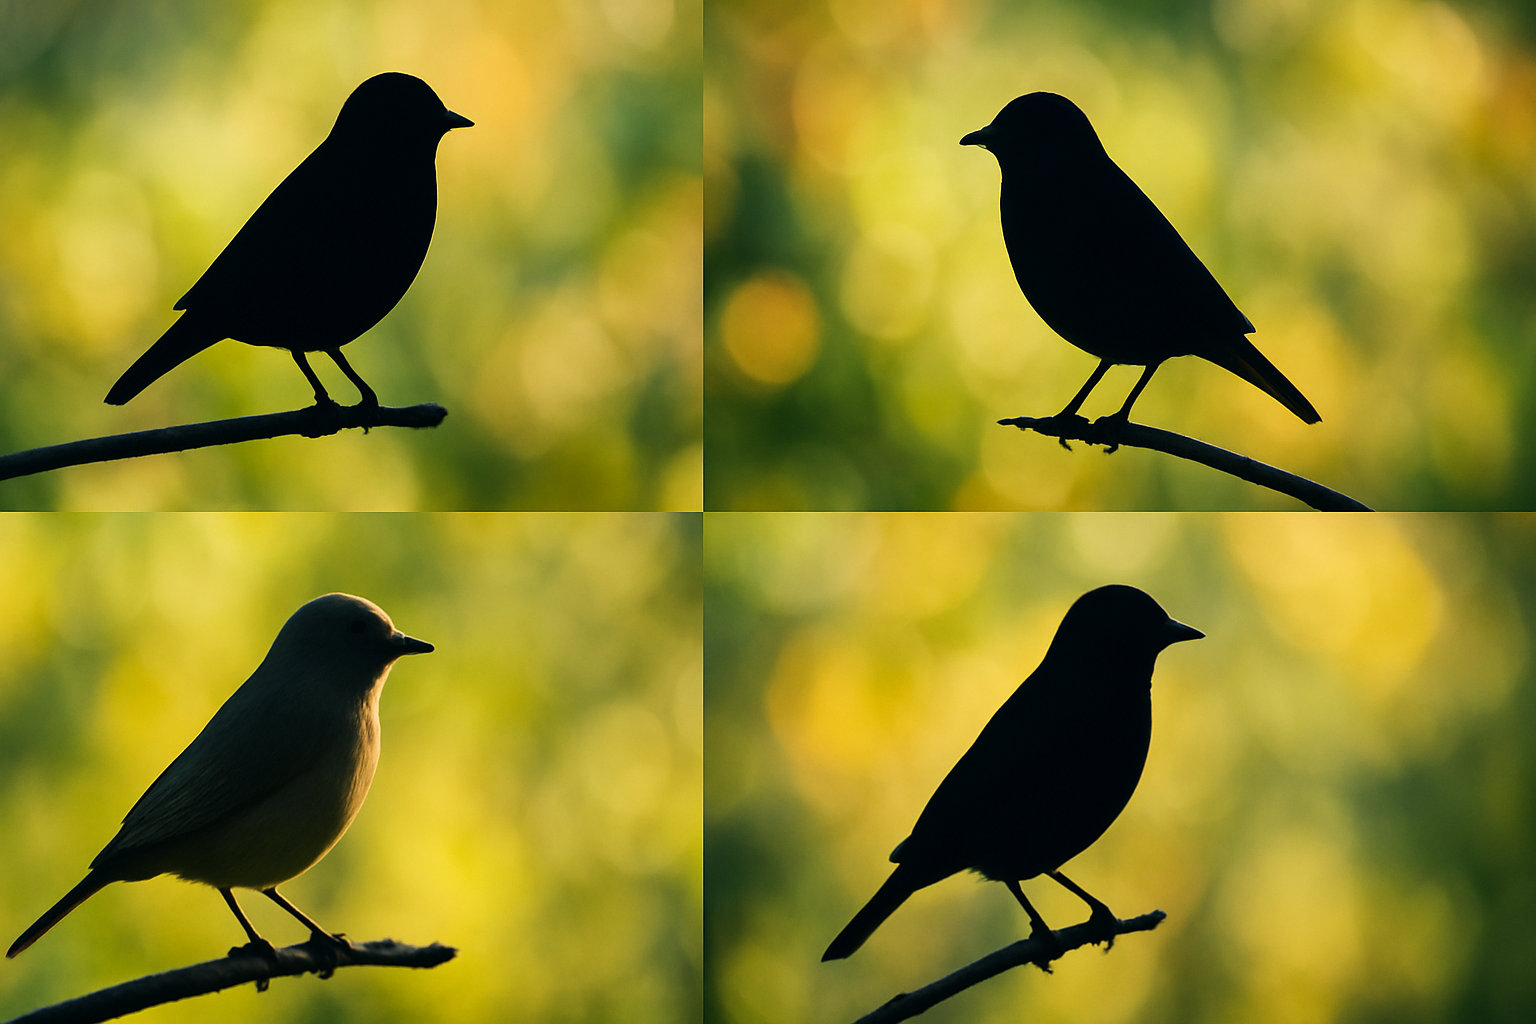
A simple example of various image augmentation outcomes
Image by Author | ChatGPT
Note that the above code is purely for illustrative purposes. In practice, depending on your problem and needs, you might not need to apply all the shown augmentation techniques; applying only a select few may be sufficient.
Wrapping Up
In computer vision models where image data may be subject to variability, image augmentation techniques can help build more robust models that learn from a variety of data conditions, making the model more generalizable. This article has shown several image augmentation strategies, highlighting their uses and implementation in Keras, as well as showcasing how to define a CNN architecture that incorporates these augmentation steps as layers.